A lot has happened in my life since I published this content. In a nutshell, I have moved to New Zealand, so my growing conditions have completely changed and I no longer have to grow indoors. As of 2016 I no longer update this website, but I have chosen to leave the content up as a legacy of information for anyone who might find it useful. Cheers!
To me, orchids symbolize all that is exotic and bizarre in the natural world, and has done so pretty much since time began …or at least since we became obsessed with their sensuality and awesome eclectic weirdness. The boundary between stark madness* and unbridled devotion among the people in the orchid world is rather blurred, which makes life a bit more interesting. Hiking is a total immersion into nature where I can disconnect from stresses and obligations and just enjoy being alive for a while.
I have two distinctly different growing spaces for my orchids because during the cooler season I live in a small city apartment in Sweden, but from about May through September I move to a small coastal cottage just north of the Gothenburg archipelago. In the city I have converted a small walk in closet of about 2.25 square meters to a pretty high tech orchid room with its own ventilation and everything. In this space I also keep two glass vivariums for more demanding micro climates. By the summer cottage I have a 10 square meter greenhouse divided into two growing zones, cool and warm.
Vivarium = Latin for a “place of life”, an enclosed case for keeping live plants, often a simulation of an ecosystem, like a terrarium for reptiles. It could also be called an orchidarium, which is a vivarium specifically dedicated to the cultivation of orchids.
Greenhouse
Here is a description of my greenhouse, and I talk a little about the pros/cons and the reasoning behind the decisions I have made. Hope you find it helpful if you are considering the same thing.
Pre-build considerations
Before you go ahead and build a greenhouse, ask yourself:
- Why do I want a greenhouse?
- What desire does it fulfil or what problem does it solve?
- How am I planning to use it?
- Where can I build it?
In my case:
- Why – living at the summer cottage from may to September, despite what kind of weather Sweden dishes out (it can vary a lot from year to year).
- What – I also grow some species with special requirements, which are hard to meet outside of a controlled environment, plus weather here is unpredictable (se previous).
- How/use – a non heated greenhouse for late spring to early fall use only
- Where – a good location is key, I only had one option and it was not ideal, so it took quite a bit of work to make it suitable.
Location and foundation
Close enough to where you can keep a close eye on things, but also consider things like light, shade, wind, water etc. I welcome some natural shade so we made sure to save a few shade trees on the sunny side when preparing the site. My site is a mountain hillside with a relentless 45-degree angle, so first we needed to construct a level foundation. Good thing my dad is a visionary and an engineer with a lot of connections. After the backbreaking labor of clearing off and exposing the rock face we constructed a concrete surround, filled it with gravel and poured a concrete slab for the greenhouse floor on top.
Design
- Brand: Classicum Serralux Vägg
- Type: lean-to, aluminum frame
- Size: 10 square meters (450 cm long, 225 cm wide, 244 cm ridge height, 15° pitch)
- Siding: 4 mm tempered glass
- Layout: 2 compartments (1/3 cool, 2/3 warm)
- Features: 3 roof hatches, 2 sliding doors, 1 mesh door
- Foundation: concrete floor with a 20 cm tall ventilated concrete base
- Technology: rain system (Vivaria), humidifier (Hydrofogger), metal halide 400W daylight light fixture, two space heaters, thermostats, timers, hot/cold running water
Layout – Since the site was on a steep slope and I already had a tall stonewall behind me, a lean-to design was the obvious choice. So one whole side of the greenhouse consist of a concrete wall and massive concrete bricks making the climate inside a bit more even and making the structure more resilient to wind as well as shading the structure somewhat from the afternoon sun. I opted for a customized standard kit dividing the greenhouse into two climate zones with one additional internal wall and sliding door. The innermost 1/3 a cooler zone, and the outer 2/3 a warmer zone.
Ventilation – I maxed out the amount of roof hatches possible, because you can never have too much ventilation options. Added ventilation holes along the foundation walls create a natural and gentle airflow inside the greenhouse as cooler air comes in around the base pushing warmer air up and out through the roof hatches. Small duct fans in two of these ventilation holes, one for each room, help pull in additional air during really hot days. Four small fans provide constant general circulation inside.
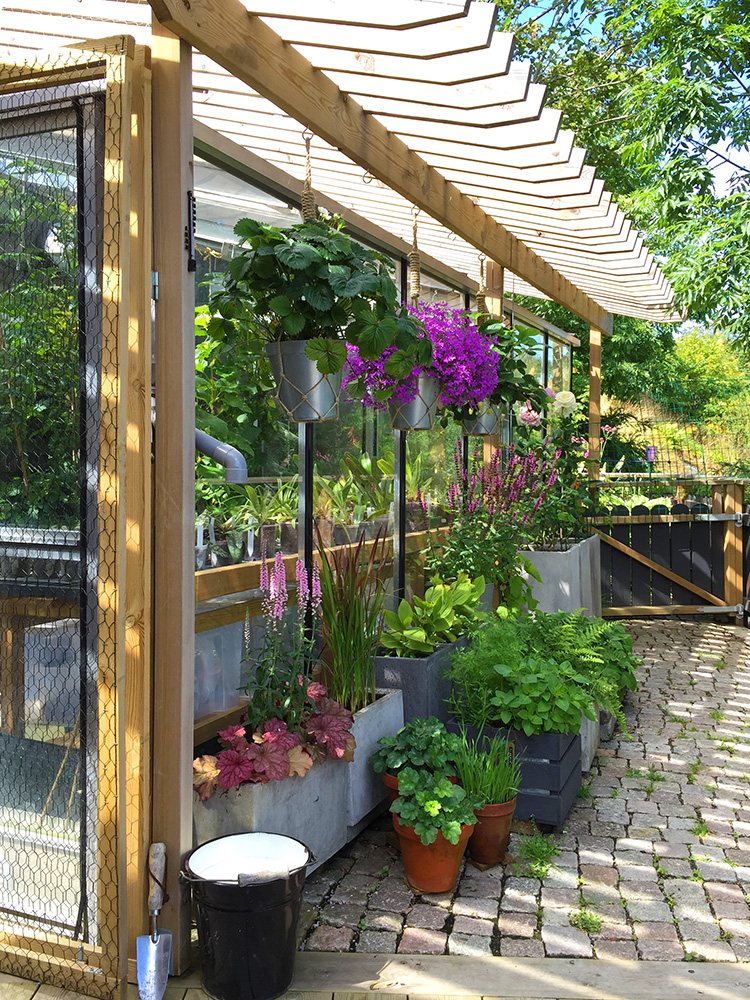
Temperature – I need to keep my greenhouse fairly cool, difficult to do when surrounded by glass and the sun is out almost 24/7. Cooling a glass building from the inside is difficult, so to manage the heat from the sun I built a pergola over the top. In effect it is a shadehouse over the greenhouse keeping the temperatures much more manageable inside. I also keep my old portable air conditioner handy should we get freakish hot weather at some point, but so far I have not had to use it.
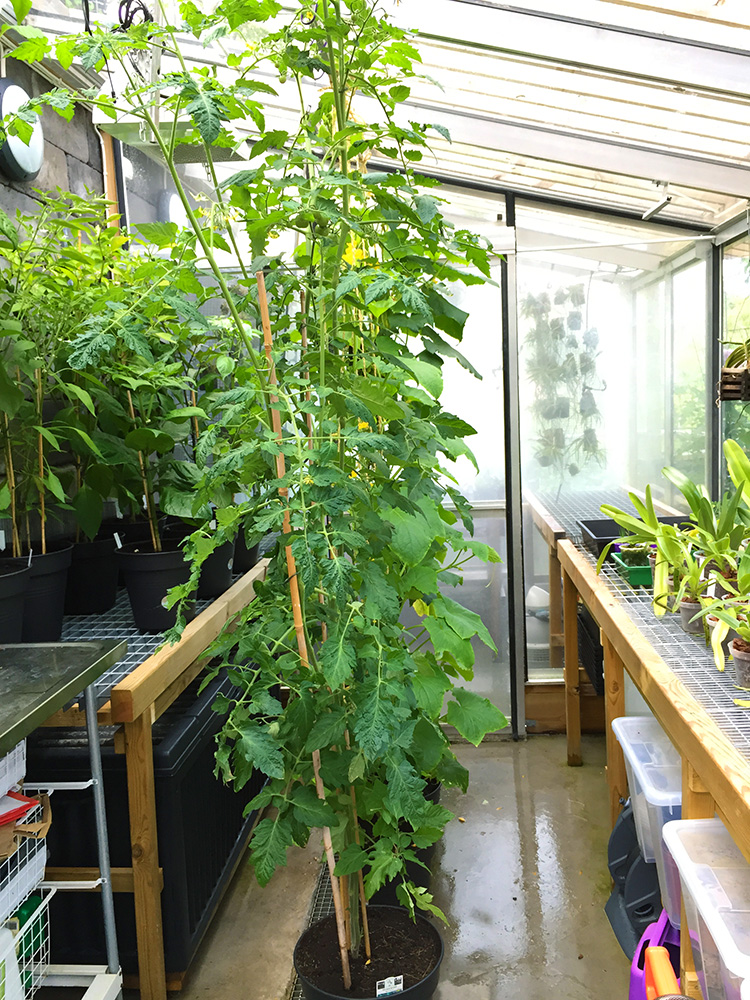
Interior – To maximize the space I custom built benches using simple frames made from pressure treated lumber with a galvanized metal grate on top (the kind used for industrial walkways and scaffolding). Heady duty, functional and easy to keep clean. Planks placed across the supports create a shelf where I place plastic bins with materials while still keeping thing off the floor.
Technology – Some automation is necessary and I will probably add to this as I go. A few timers installed in the electrical service help me program the different climate controls such as light, rain and fog. For now I use the light, a huge metal halide fixture, in the warm zone. But I could probably use one more in the cool zone for when days are short and sunlight scarce. The cloud forest climate is created using a Vivaria rain system, same as I use in the vivarium, along with a Hydrofogger humidifier. Early spring/ late fall I use space heaters on thermostats to manage temperature, one in each room. I water the warm zone and handle fertilization manually.
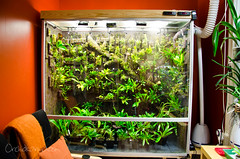
Cool vivarium
It is a glass, polycarbonate build with aluminum frame. It is a converted terrarium previously used to house boa constrictors that I bought used online and redesigned to suit my needs. It measures 175 cm wide, 160 cm high and 65 cm deep. You can read all my notes on the build here.
Light
I use 4 Dulux 80W lights. I could not find any proper fixtures for them, so I had to build my own. I got electronic ballasts then bought reflectors for regular T5 tubes, but them in half and put them together to make a perfect reflector for the Dulux lights. The new 80W Dulux L 840 are very intense and especially suited for tall vivaria – up to 180 cm tall. Color rendering is 85% accurate. Each light put out 6000 lumen, so I get a total of 24000 lumen spread out over 175 cm width. At 4000 K the white light is close to the natural daylight range of the color spectrum. I would prefer a color temp closer to full spectrum, but with a tall vivarium like this I still feel this is my best option. They have a rated service life of 8000 hours, but with the kind of use I do, light replacement is recommended every 2,5 years.
Temperature
For the cool air intake installation I got a simple duct fan (Ventilution 100mm, two speed 145/187 m³, 27/34 dBA) and installed it to pull in air from the old school vent in the orchid room (a square hole in the wall leading to the outside). Some plastic flex tubing bring the cool air to the viv. at the other side of the room. This works well about 9 months out of the year. I use a Bozz ACR6000 portable air conditioner to help cope during the warmer summer months. A Lucky Reptile Thermo Control PRO II thermostat handles the regulating part. I have it set to keep 20 C during the day and 10 C at night. The thermostat sensor is placed in the middle of the vivarium, so temperatures closer to the lights are usually a degree or two warmer, while lower you get the cooler it gets as well.
Humidity
I use a Honeywell 5L capacity ultrasonic cold air humidifier, and pipe it into the vivarium though a “chimney” made out of PVC pipes. I control the RH with a Lucky Reptile Humidity Control II humidistat, the same brand and concept as my thermostat, with two circuits making it possible to have different settings for day and night. I set mine for 75% during the day and 85% at night with a 5% differential, which means that the humidifier will start up as soon as the measured humidity drops 5% below the desired setting. A temperature and hygrometer which remembers high/low readings tells me all is working like it should.
Air circulation
I use 4 Scythe Gentle Typhoon, 120 mm, 1850 rpm fans – and they are amazing!! They move A LOT of air and are nearly silent (0.083 A, 28 dBA, 98 m³/h). All 3 fans ate link (daisy chained) to one 12V power supply. These power supplies are adjustable from 3,5–12 volt, so you can easily adjust the fan speed to control the air movement, but I run these at full power 12V.
Watering
I have a Vivaria rain system installed using an E.N.T. Power Pump (24 volt, 15 watt, 9 bar, 1,7 liters per minute) rated for 35 nozzles. Right now I have 14 nozzles, but am contemplating installing 8 more… I also have a drip system for the EpiWeb back walls complementing the rain system. Both are hooked up to the same timer and run 4 times a day in the morning and in the evening with 6 hours of drying time in between.


Small intermediate vivarium
This small vivarium is yet another terrarium conversion, although this one is not automated like the cool viv, it is basically just a glass case with aluminum framing, a light on top and a couple of fans inside. I water by hand. It measures 75cm wide 80 cm tall 40 cm deep.
Light
I use a Nebula Hobby light fixture this vivarium. The reflector design creates a positive airflow, which helps to keep the heat away from both plants and gear. Complete with warmstart system for optimal lamp life as well as instant bright running. Unfortunately they do not come with a reflector, the fixture is just painted white inside. But I got some diamond mylar and glued them in place as reflectors for mine. Each Nebula fixture come with two 55W CFL tubes from Osram (Dulux L 55W/954) which amounts to about 9000 lumen per fixture at 5400K (daylight) with a CRI value of 90%. They are rated for 20 000 hours, but has a service life of about 16 000 hours, in other words 3 years at 14 hr per day.
Temperature
The ambient temperature in our apartment stays around 20 C, maybe as high as 28 C on extremely sporadic days in the summer. Just with the heat from the light on top of the vivarium I am maintaining 22-24 C during the day most of the year, a degree or two cooler in the winter and a degree or two hotter in the summer. Night temps around 15 C. I use synthetic wine corks to make an air space between the light and the glass on top to help ventilate some of the excess heat. The cooler part of the year I use 1/2 a cork, and in the summer a whole cork as spacer. Very scientific… For really hot days I place an 80mm computer fan by the end of the light as well for the same purpose.
Humidity
I used to have 3 trays on the bottom filled with water and a radiant heat mat underneath to help raise the humidity. But after filling the space with orchids I do not have to keep the humidity trays anymore, they serve as collection trays instead since I have no drain in this vivarium. Thanks to the amount of plants and the humid growing media, humidity usually stay around 80% inside. I have the option to hook up a small humidifier if I feel the RH is too low, or when I will go away for a few days and cannot water properly. A temperature and hygrometer tells me all is working like it should.
Air circulation
I use two Scythe Gentle Typhoon, 120 mm, 1450 rpm daisy chained to a 12V power supply. These power supplies are adjustable from 3,5–12 volt, I run these set to 9V as they do push a lot of air already.
Watering
I water this vivarium completely by hand, 3-5 times a week the warmer part of the year 1-2 times per week during winter.


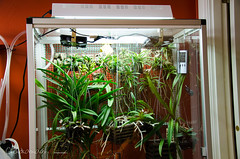
Medium intermediate vivarium
The third and latest vivarium build is primarily used for vandaceous orchids (primarily Neofinetia). The case measures 80 cm wide x 140 cm tall x 40 cm deep and it is another low tech build like the small intermediate viv.
Light
I use a Nebula 2 light fixture here, slightly more robust and better light than the hobby versions I have elsewhere. It comes with a diamond reflector built in. It runs two 55W CFL tubes from Osram (Dulux L 55W/954) which amounts to about 9000 lumen per fixture at 5400K (daylight) with a CRI value of 90%. They are rated for 20 000 hours, but has a service life of about 16 000 hours, in other words 3 years at 14 hr per day.
Temperature
I maintain the temperature I want just with the heat from the light on top of the vivarium. Keeping it at 22-24 C during the day most of the year, a degree or two cooler in the winter and a degree or two hotter in the summer. Night temps around 15 C. I use synthetic wine corks to make an air space between the light and the glass on top to help ventilate some of the excess heat. The cooler part of the year I use 1/2 a cork, and in the summer a whole cork as spacer. Same as for the small vivarium.
Humidity
Some water evaporate from the collection trays on the bottom (I have no drain in this vivarium either). Humidity usually stay around 80% inside mainly due to the amount of plants and the frequent watering regimen. I hook up a small humidifier if I feel the RH is too low, or when I will go away for a few days and cannot water properly. A temperature and hygrometer tells me all is working like it should.
Air circulation
I use two Scythe Gentle Typhoon, 120 mm, 1450 rpm daisy chained to the same 12V power supply that run the small vivarium fans. These power supplies are adjustable from 3,5–12 volt, I run these set to 9V as they do push a lot of air already.
Watering
I water this vivarium completely by hand, every day the warmer part of the year and about 3 times per week during winter.


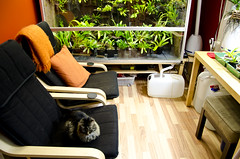
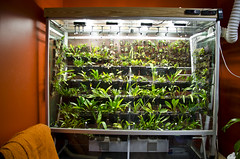
Growing room
The former guest room in my 19th century apartment is now completely dedicated to orchids. It is a small room with high ceilings and a tall window facing north-east.
Light
Since I grow in a pretty dark north/east facing window, my supplemental lights are on year round, but are especially needed during the darker months out of the year. We only get about 6,5 hours of daylight in Gothenburg in January, so supplemental lights are a necessity. I use two Nebula Hobby light fixtures in my tall window, the very same fixture I use for my warm vivarium, two 55W CFL tubes from Osram (Dulux L 55W/954), 9000 lumen per fixture at 5400K (daylight), CRI 90%. One cover the top two shelves and a second one hangs about half way down and cover the lower two shelves and the nursery bench for the flask babies.
Temperature
I keep my growing room intermediate temperature. I keep one of the windows cracked open a little bit almost year around (except winter) and never turn on the heating element. By closing the door at night I can bring the temperature down quite a bit, then by just opening the door in the morning the temp creeps back up during the day. During the colder months (November-March) the night time temperature drops to about 15 degrees while daytime temps hover around 20-22 degrees. The warmer part of the year the temperatures are a few (3-5) degrees warmer thanks to a fairly shady location and thick brick walls.
Humidity
I use the same model ultrasonic humidifier for the room as I use for the cool vivarium. But since the cool fog kind of blows out of the nozzle then immediately falls I needed a rig to bring the flow further up in my growing window then have it gently fall down on the 3 levels of orchids below so I get better coverage and at the same time raising the over all RH in the room. However, I do not wish to keep the 5L water container for the humidifier 3 meters up in the air, so I built a chimney using regular PVC pipes and a cheap funnel. Three holes drilled in the pipe running across the top and the fog flows down the top like magic..! With the door closed at night, I get about 70% humidity. I keep it on a simple mechanical timer running the unit every other half hour for a half hour at a time every night.
Air circulation
I use 140mm Fractal computer fans – one on each sides of every shelf. Each fan is daisy chained to two 12V power supplies, 4 fans per unit. These power supplies are adjustable from 3,5–12 volt, but I run all these at full power 12V. These particular fans are not terribly effective, but they do the job (I recommend using Scythe Gentle Typhoon fans instead, it is a huge difference in the amount of air they push).
Watering
I water completely by hand, 2-3 times a week the warmer part of the year 1-2 times per week during winter. I primarily use a pressure sprayer a pretty fast method when you have as many plants as I do. I usually fertilize once a week, a bit less in the winter.