Ok. Here are a few notes on the build… I have had requests for a detailed outline for how to build this so I hope this will suffice.
All in all… you can buy a beautiful nano vivarium from Dusk, so unless you are pretty dedicated and is willing to put in a lot of hours it would probably be better to go with a premade one. That said, I think my design is really nice, and I would have made some significant changes to the original anyway (a better growing light for one) if I had bought it, so for me it was worth it, and it was a fun project to boot. The material cost for my build, not counting the orchids, came in around 700 kr, the original nano cost around 2500 kr.


- I started with a sheet of 15mm PVC, drilled 4 holes along the short edges and attached them with a strip of aluminum and 4 mechanical screws. Next I siliconed the bottom in place (read about how much fun it is to manually cut circles out of 3 mm PV here – and I needed two…). Best to use non-toxic aquarium silicone.
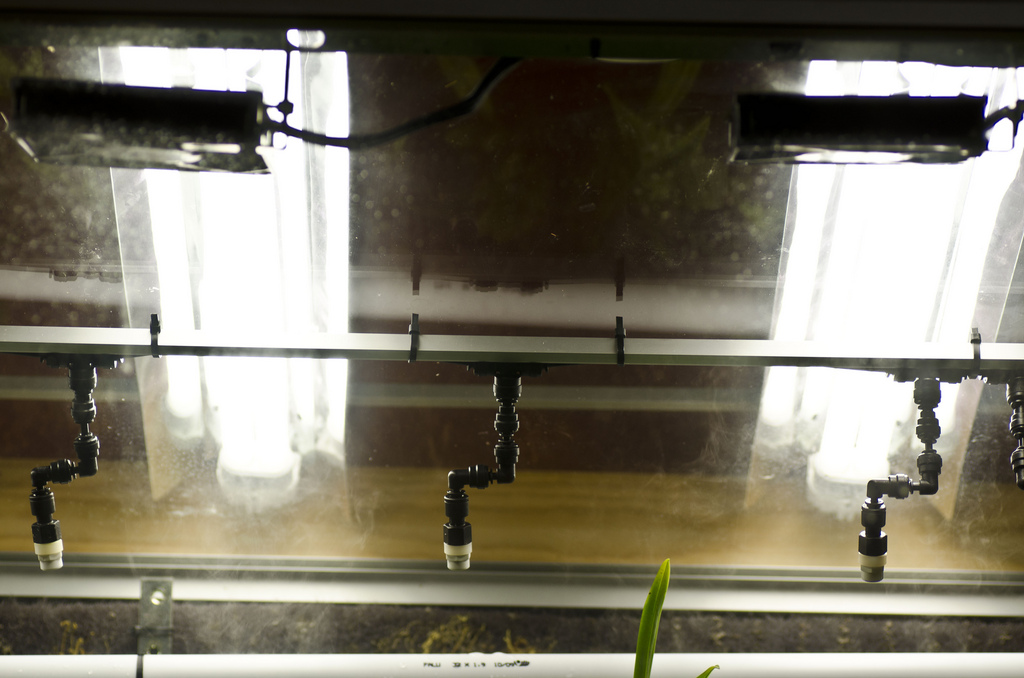
- Next, the electrical… thanks to some help from my dear husband, we drilled a hole for the bulb of the larger growing light to drop in (23W low-energy CFL, 6000K, 1020 lumen, about 3000 fc. at the top 25 cm distance with the reflector) aiming to keep most of the electrical on the outside due to high the RH inside.
- Next we installed a 12V “mood spot” to be used in the evenings when we would like to enjoy the view and not have to wear sunglasses… Finally we wired up the 80mm computer fan. All the cords were pulled through the lid into a channel on top and then down the back behind the aluminum strip in another, flexible, channel.
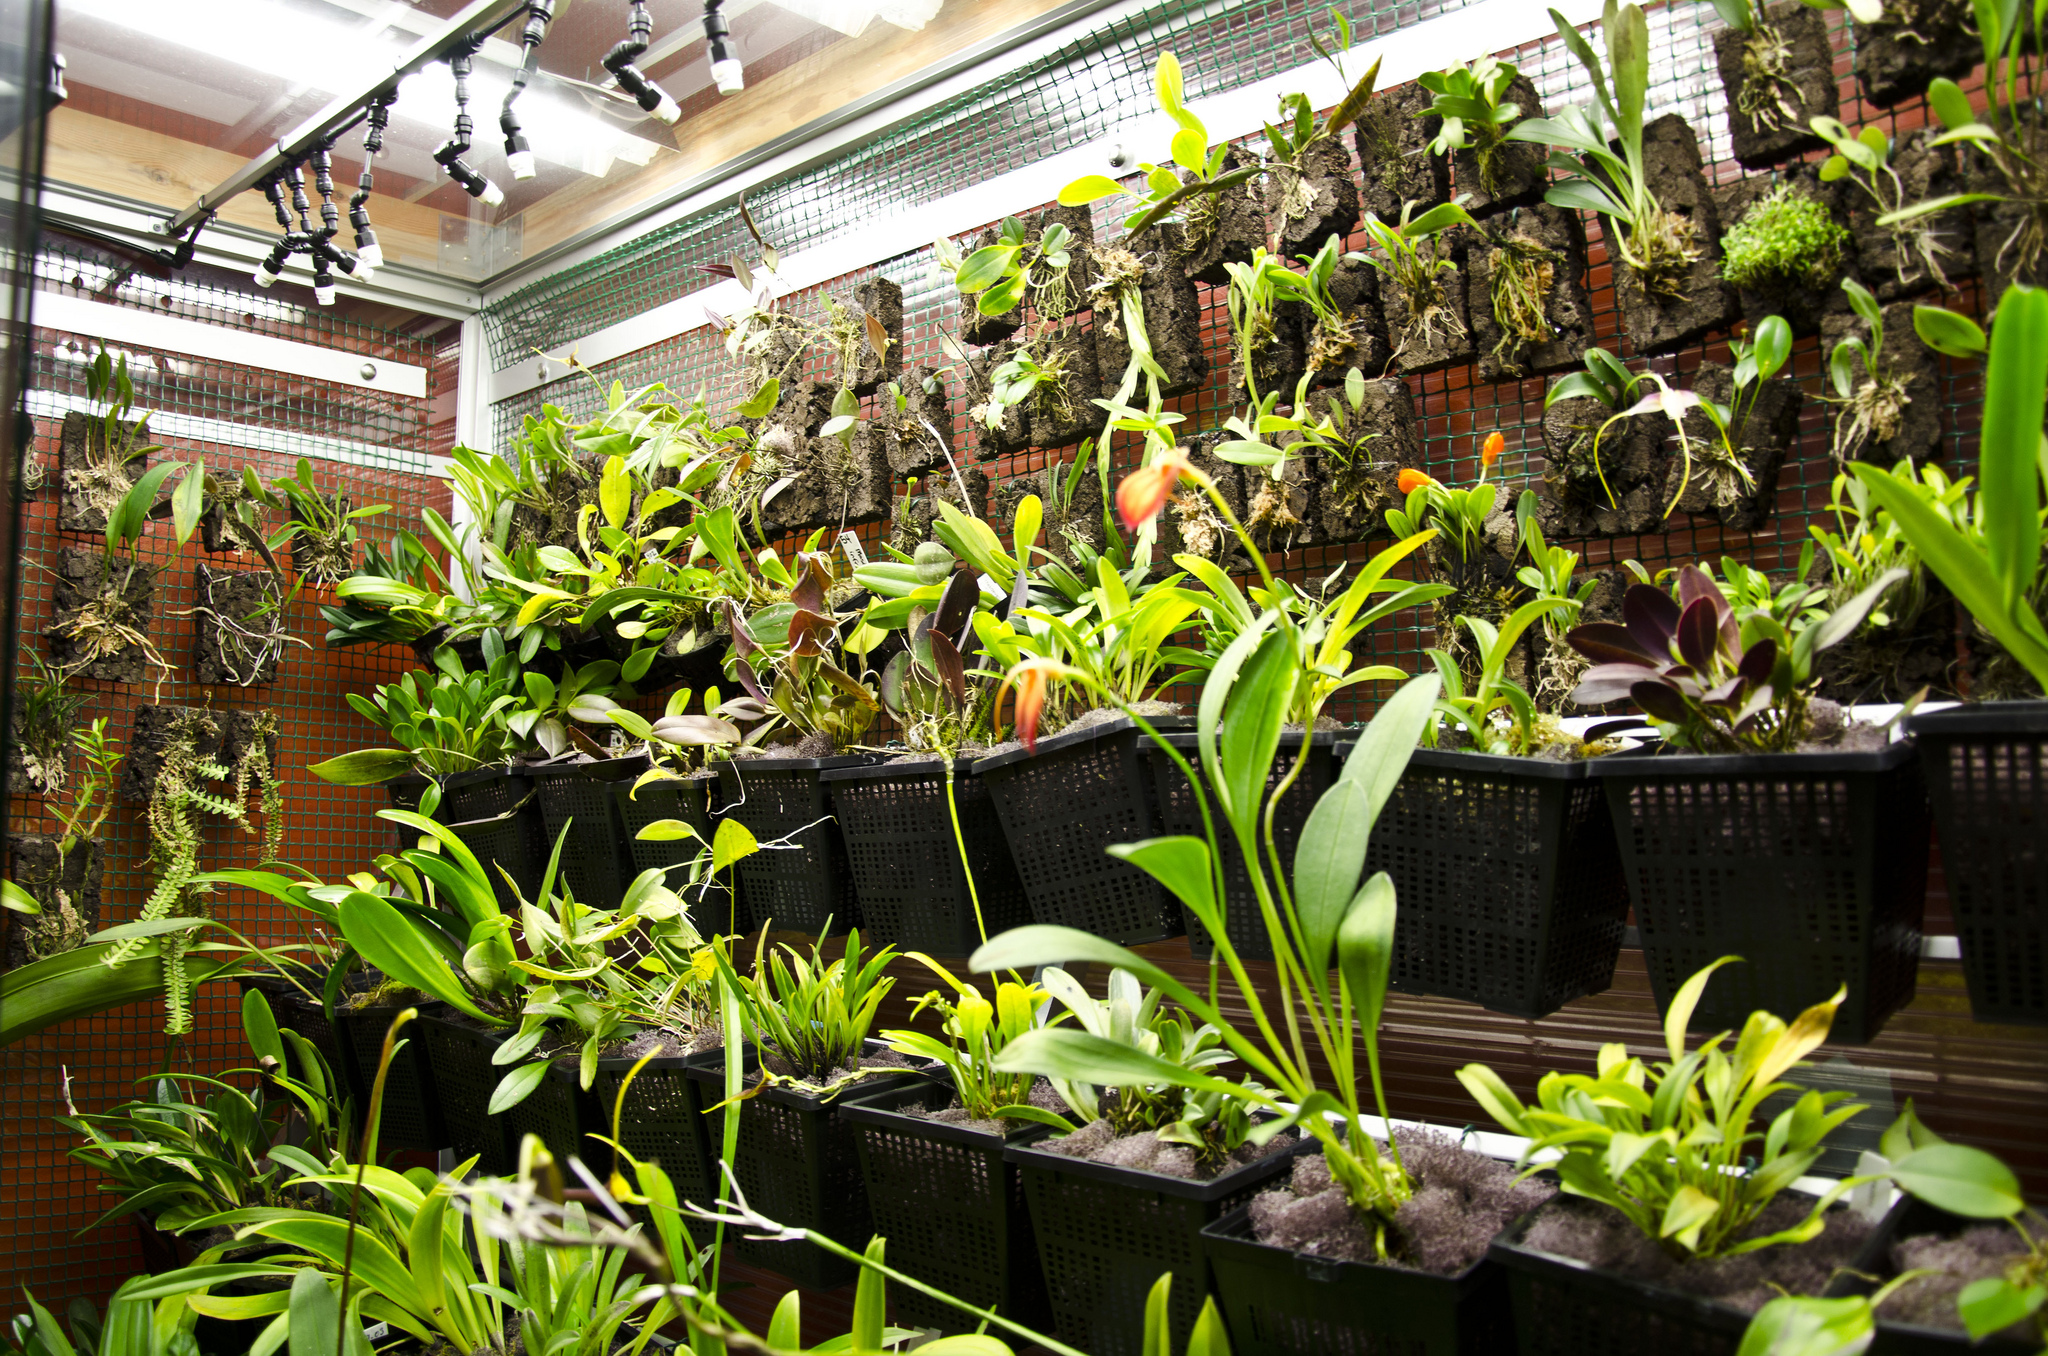
- The main feature in the nano is the terracotta clay pipe. Filled with water it is supposed to leach water out and water the plants mounted onto it as well as add to the RH inside. I made the bottom watertight by gluing a terracotta saucer to the pipe with construction adhesive, then used the aquarium silicone to seal in the adhesive incase it might leach toxins into the water.
- Next I attached a few mini-orchids I had gotten at the Gothenburg International Orchid Show to the pipe with fishing line.
- I filled the bottom saucer with leca and water then placed the pipe in the middle and a bonsai pot with a few bulbos in front of the pipe… the pot is temporary until I figure out what to do with them…
And it is done!! The temp/RH meeter is hanging on one of the screws holding the tube together. The temp hovers around 24 degrees and RH around 85%. So far so good. Now I need more orchids in there!!

[…] for 15 minutes 5 times a day (with 3 hours in between). The 80mm 12V fan is on all the time. Check this post on the nano-build to see more on the details. The whole system works beyond […]
WHERE did you get the ceramic pipe? I have been trying to make this forever!
Troy, I got the pipe from a friend, sorry I do not know where he got it.
sorry for this late reply.
super idea Karma, I hope the nano orchidarium is doing well! maybe we can see some latest photos if you’ve got time?
as for the ceramic pipe, I found a website which is offering just that:
http://www.epiphytenbaum.de/46
haven’t tried it myself, looks interesting though. but what’s the benefit of ceramic as opposed to real (chunks of) trees? durability?
Hi Jota! Sorry.. I sold the nano vivarium and built a huge one instead… Look here.