Alright… finally a third report on the vivarium project. It is still a lot left to be done, I am still waiting for all the supplies from UK for one, but it is actually starting to feel like I am making some headway… This is what I have been up to the past two weeks. For starters dear husband and I spent about 3 hours (!) walking the aisles of Bauhaus (just like Home Depot, right down to the orange shelves – but German…) shopping for supplies for all the loose ends. I think we did quite well.
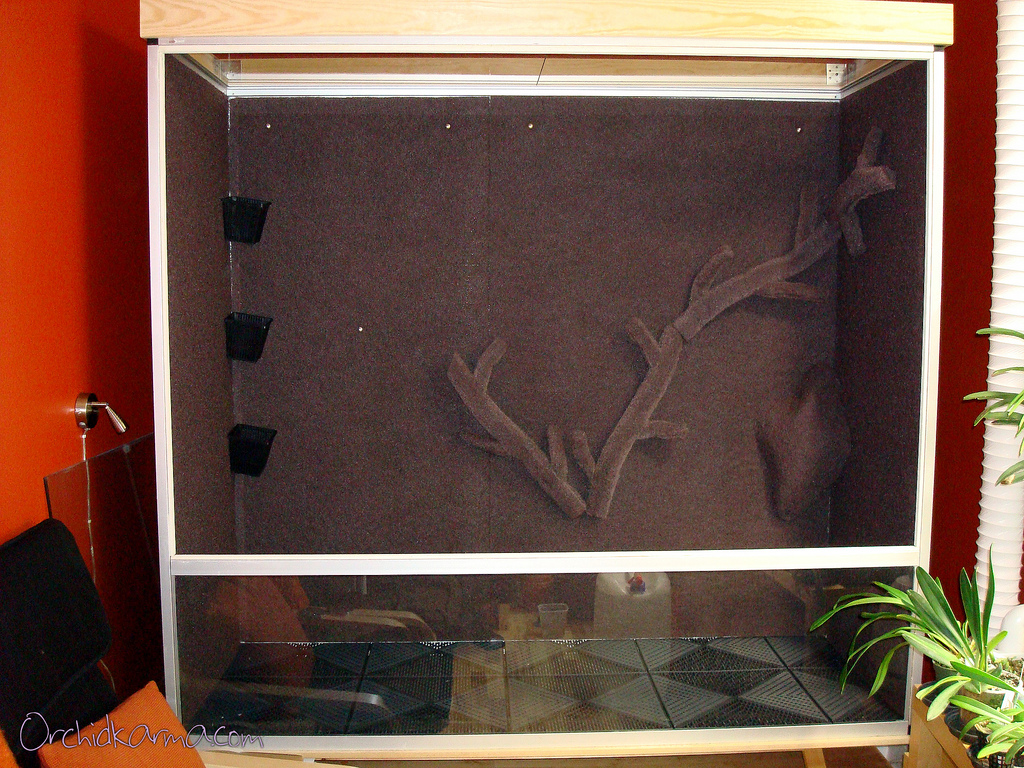
I wanted to install a floor inside the viv. that would not only raise the pots off the ground so they would not stand in water, but also would let water through and allow for better drainage. So I got some modular plastic flooring tiles used for patios and decks. They were pretty easy to assemble just by cutting to size with a hack saw and then locking the pieces together. I cut them just long enough so they would rest on the front and back aluminium frame, leaving a couple of centimeter airspace underneath. I used plastic plant saucers as center supports for extra stability. I will install a drain too, but that is coming from the UK…
Next, the cool air intake installation. We spent a long time in the bathroom supply aisle weighing our options. There are some really complicated contraptions out there, and they are nice and quiet, but also very expensive. So, we settled for a fairly simple model, that runs fairly quiet (at 33 dB) and wasn’t too expensive. Luckily I have one of those really old school vents in the orchid room. Basically just a square hole in the wall with a hatch you open by pulling a string. This vent was the perfect candidate for my cool air intake fan. We just removed the hatch and put the fan up in its place. Some plastic flex tubing will bring the cool air to the viv. at the other side of the room. Once the tubing went on the fan also ran even more quietly.
To give me something to mount the lights to, and to hide some of the equipment dear husband helped me build a wood frame for the top. Simple light weight construction, some L brackets to make the box and a few more attached along the sides so the frame could rest on the top of the aluminium frame with about a centimeter overhang. It fits beautifully and looks great. Next I put some rubber weatherstripping around the top frame, mainly to help hold the new top glass in place but also to create a weather seal. Easy and effective. The two glass sheets fit like a charm and will definitely stay put.
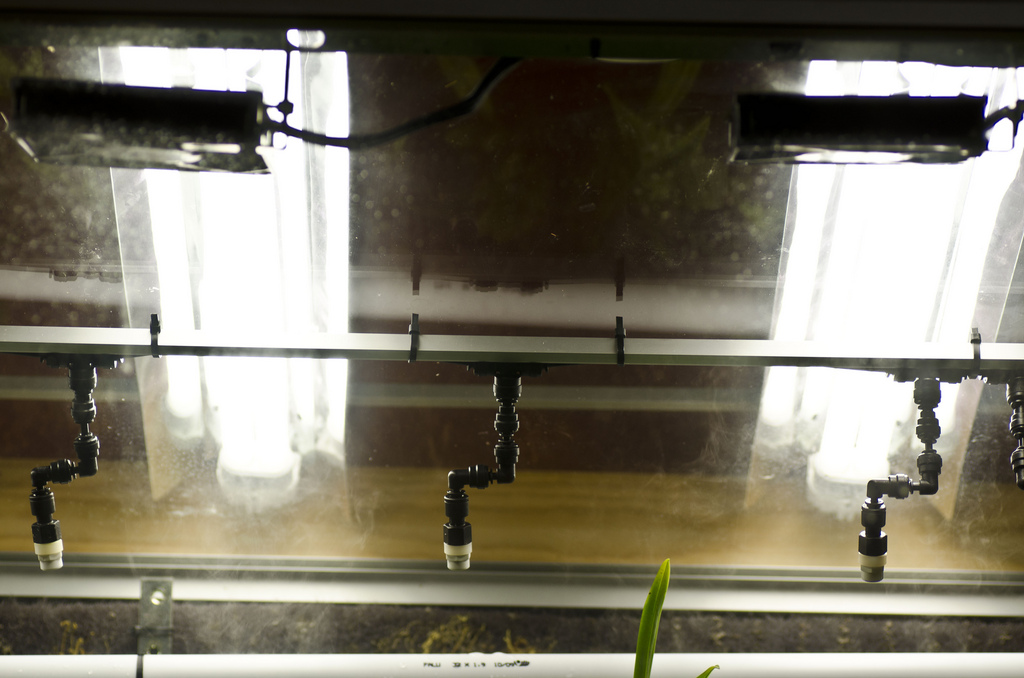
In preparation for the rain system installation and ventilation fans we put in two L shaped aluminum bars running the whole length of the front of the viv. One at the very top and one below the sliding doors. Here I can drill holes to mount the spray nozzles and fans when the time comes. I also think I have found a good way to attach the EpiWeb plant mounts. I got a box of black long nails, they are easy to attach and pull back out and you can barely see them once pushed in. I also played around a bit more with the EpiWeb branches. But I will probably move them around a few more times before settling on the look, then I will “plant” the moss. First I need to get the lights installed. Hopefully they will arrive this week because at least they are finally in transit. So, lights, ventilation, fog and rain system next. Stay tuned.


PS! I edited this post to put all the photos in one place, it was bothering me how messy it looked before. What can I say, I’m a designer…)

That’s great progress. We spent several hours in the plumbing aisle of Home Depot this weekend too!
Have you figured out how you’re going to pump the fog in and what you’ll use to produce it? I’ve been looking at the Nutramist nebulizers, I’m intrigued that you can fertilize with them. We’re just not sure how much for a 3 head unit will produce though, will it be enough to really cloud the thing up.
Thanks for the update.
Christina
speaking of moss. I have a planted nanotube with the moss you kindly sent and it’s growing great. However, I’m moving. I was planning on pealing the moss off the tube and transferring it to plastic bags, making sure they stay damp. It might be in the bag for up to 3 weeks before I’m able to set up the tube again. What do you think? Also, I’m transporting a few mini orchids? Any suggestions?
That looks like it’s really coming along! I love the floor tiles concept. Are you planning to use anything on top of them? Will you be able to remove them for cleaning or whatever once the rest of the structure is in place?
Thanks a lot guys!! 🙂
Christina: I decided to buy a second humidifier for the fog, the same I use in the orchid room. It is ultrasonic and produces a very fine mist. Works great in the room, I hope it will work just as well for this. It has a very large (5 liter) water tank and since it is not clear there will be less problems with algae growth inside. My main goal is to create cool fog with it (for cooling the really cool growers at night), so I will make the fog intake next to the cool air intake. Watering will be handled by a vivaria rain system. I plant to fertilize by hand using my 5L high pressure sprayer (it has a nice long wand making it easy to reach). Some species are VERY sensitive to fertilizer (Telipogons for example) so I want to control that manually.
Gillt: Nice to hear that the moss is growing for you. 🙂 Unfortunately if you let the moss dry too much it will not make it… and if you pull it off the tube it will be very difficult (or maybe impossible) to get it to establish to it again. I don’t know… You could try it, and if it does not establish again you could always run the living moss in a mixer to pulverize it, make a paste, and spread it to the tube again. That should work, but of course take some time. Transporting minis should not be too hard. Just wrap them up well with newspaper and pack them up, they should be fine for several days in transit.
Bibliofloris: Thanks, yes I think the floor tiles will work quite well. I plan to keep potted plants on the bottom, the ones that are too large to mount for example. I had originally planned to make a 3 tier shelves for the bottom, kind of like bleachers, but until I have more plants I don’t think I need to. I can always add that later if I need to. Since the tiles are just resting on the aluminium frame (front/back) I can just take the plants standing on it out and then lift the whole floor piece out to clean under or whatever.
Thanks for the advice! Btw., looks like you’re making great progress on the vivarium. Keep us posted.
Hi Karma,
Quick question, do you leave your fans on when the lights are off (nighttime)?
thanks again for all the great info!
Thanks! 😀
Andy: I keep all my fans going 24/7. I think good air circulation is critical – ALWAYS – to avoid problems with mold/rot. But also, it helps cool the orchids down even more at night.